- Home
- Knowledge base
- Fiscality - Fiscaliteit (mainly BELGIUM)
- How to bill based on actual rates with Wattify split-billing
How to bill based on actual rates with Wattify split-billing
With a split-billing account in Wattify, you can easily have employee payouts calculated and made based on CREG rates.
However, these are based on an average of certain regions and or country averages. Below, for example, you can see an overview by region and the Belgian average, each for a digital and analog meter.

Recently, the FPS Finance has again stressed that the reimbursement of charging sessions on the energy contract of the employee must be done at the actual cost incurred by the employee. One could say of this that if everyone takes an average of the actual cost, together this will also be the actual cost if you add up all the employees of the country. However, as many will benefit as will suffer.
There are several players on the market who have insanely expensive solutions to this, including offering separate digital meters, which is practically totally unfeasible and also not desirable, oa for example a couple who would both have a company car at a different employer would have to get a total of 3 electricity meters in the house, which is actually absurd.
Actually, we can keep it much simpler. If the employee receives his energy bill from his energy supplier at least once a year, you can very easily calculate the average cost per kWh there. This then immediately takes into account any capacity charge that the employee with a charge point will undoubtedly feel. However, an energy bill contains a fair amount of fixed costs that are not related to consumption, which then actually implies that the more you consume, the more spread out per kWh those fixed costs will be.
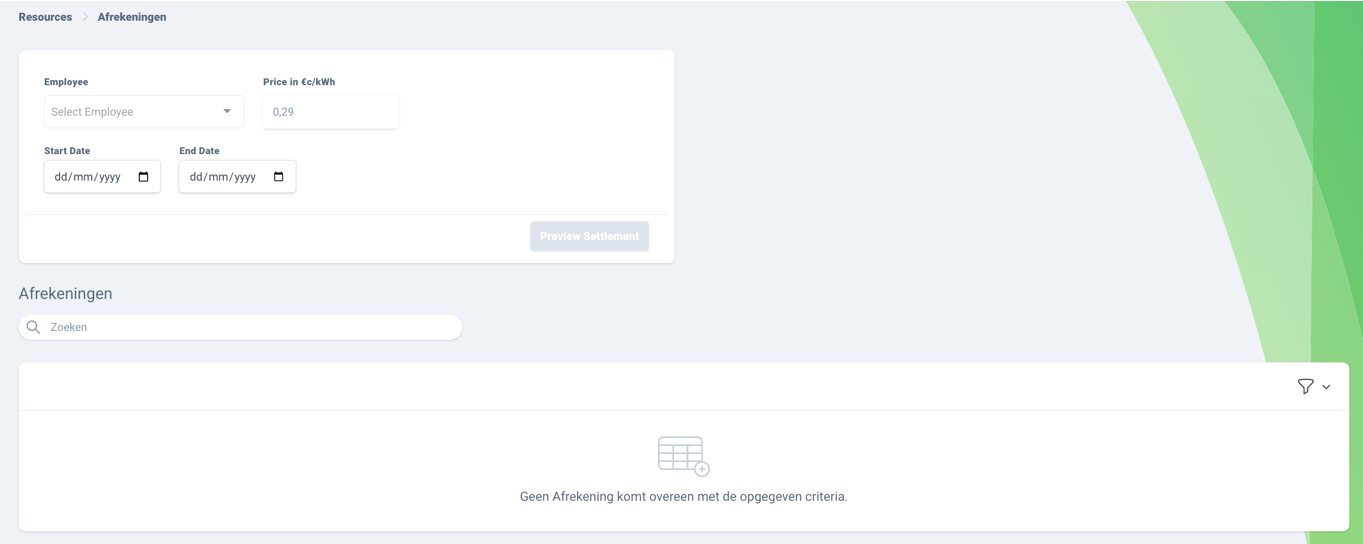
As an employer, you have the option of adding "statements" in the back office. These can be found in the menu Invoicing -> Settlements.

In the screen you get an overview of the already created statements.
To add a new statement, you need the statement of your employee. Such a statement looks different for each energy supplier, but you can undoubtedly find the start and end date as well as the total price for that period (without the individual advances) and the total energy consumed. If you divide this total price by the total energy consumed, you obtain the actual price per kWh for the given period. Be sure to take the price including 6% VAT, which is common for private energy contracts.
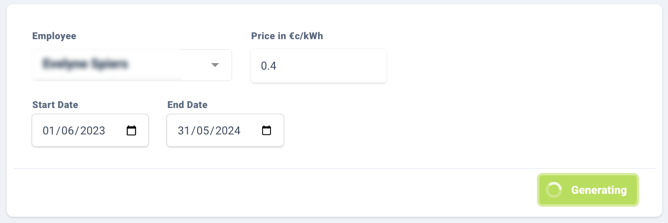
So you need a start date, end date and unit price. Enter these 3 data together with the selected employee and click on "preview settlement". For example:

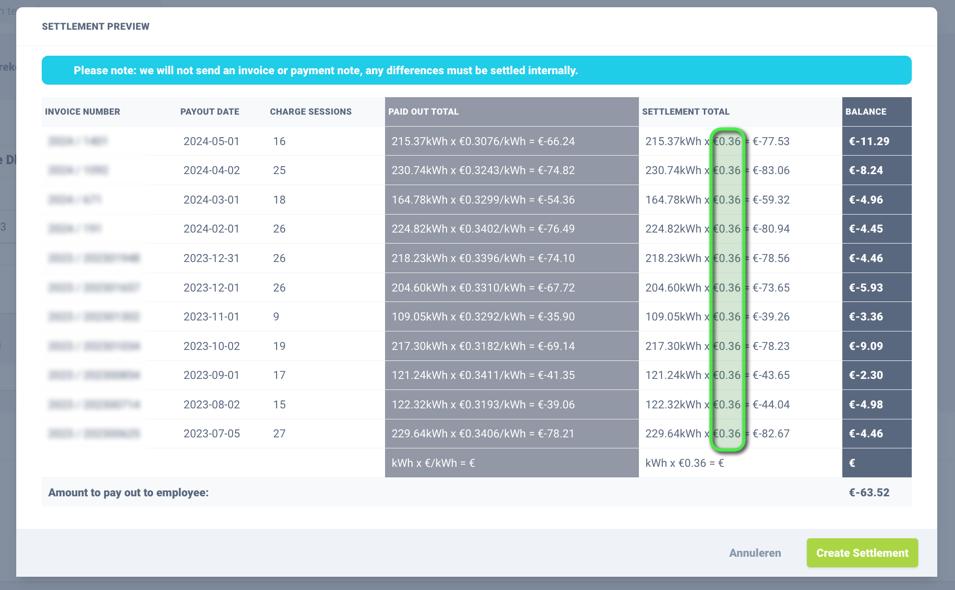
You will first see a preview of what the new calculation for the selected period looks like. There you will also immediately see the original unit price that was used at the time of the payout. If the average price for this period is greater than the amount already paid out, you will end up with a larger amount at the bottom. This amount still needs to be adjusted to the employee. If it is the case that too much has been paid out, this will also be indicated in the overview. When you finalize the invoice by clicking on the button create invoice, both the employer and the employee will be notified. You can also save the statement as a PDF.

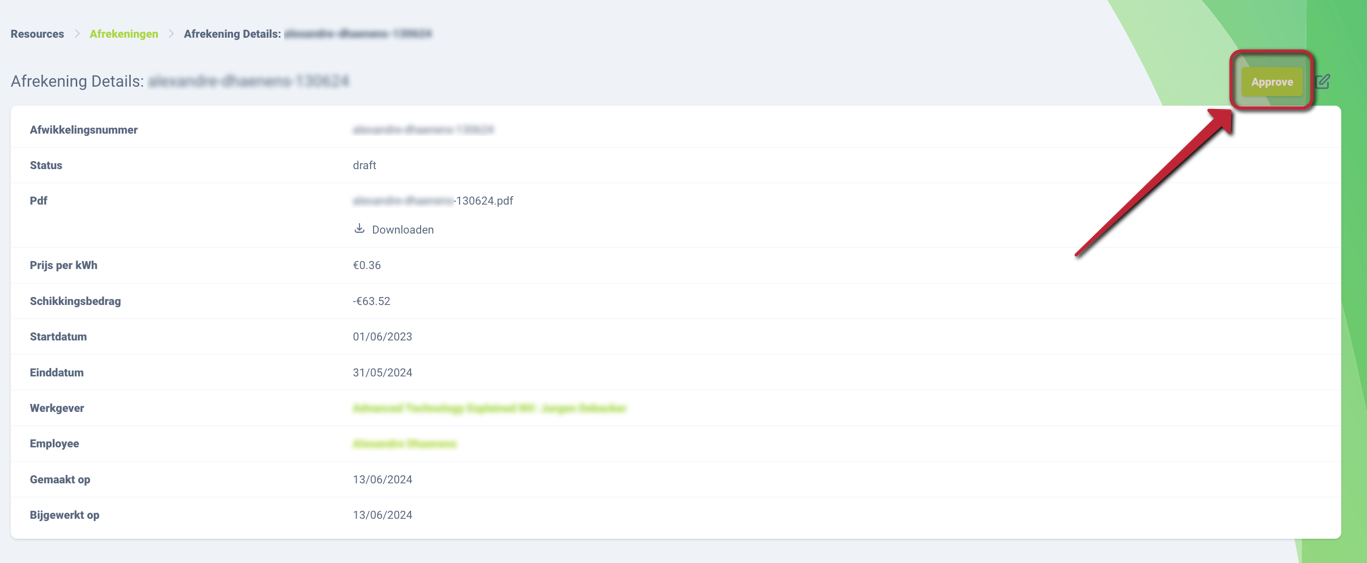
After you have created this statement, it is in the status "draft". After you have confirmed it with the button in the upper right corner, these charging sessions can no longer be changed or charged again. Both employee and employer receive a PDF confirmation by e-mail.

NOTE: This statement is without obligation. Wattify will not generate any additional invoices for this. Depending on how the employer incorporates this way of working in his or her car policy, this can be done in consultation between employer and employee at regular intervals. Wattify does not need to see details regarding the employee's electricity bill for this. This would violate GDPR legislation and is therefore something purely between employee/employer.
Related articles
Did this answer your question
Thank you for your feedback
Did not find an answer?
Our team is just an email away and ready to answer your questions